Thursday, November 14, 2013

Laundry Nightmares

Today I am doing laundry, I do laundry everyday but I don't count it as done until it is folded and put away.

Do you also end up with three or four or ten baskets of clean laundry stacked up waiting to be folded and put away? Mine end up on the second couch, you know because if they were on the floor I would think they were dirty. Anyway the laundry got switched a few times this weekend, maybe four, but never got folded or put away. I don't mind folding, but I hate putting away the kids laundry. When I don't put it away they throw every item into one drawer so it is over stuffed and they still can't find anything, and half of it ends up on the floor and needing washed again before it was ever worn.  I guess they are still too young to put away their laundry.

I will occasionally fold everything and divide it into baskets for each child and hope that my husband will take the hint and put everything away. He often does not have the time after getting off of work late to help with laundry (and I think he hates it as much as I do). So the kids dig their clothes out of the baskets for a few days until I can't stand the mess and I fold everything again and put it all away.

We have a horrible laundry room, in that we don't have a laundry room at all. We rent and we found a house with laundry when we moved, but what it should say is washer and dryer hookups at the end of the kitchen between the oven and the pantry. It is a huge step up from the laundry mat but there is no storage for laundry and no room for folding of any sort. I was looking on Pinterest for ideas that I might actually be able to implement to make this never ending job a little easier or less chaotic.

I dream of this


This is about the space I have


Then I found this blog, the inquisitive mom. She has a great post on how to get each kids laundry organized, I will implement her two baskets per child idea for my two older kids and add it as the little ones can get into putting their clothes into their own basket. At this point I am lucky if they put their clothes into any hamper. They are often left on the bathroom floor or my bedroom floor.  So I am definitely going to have my husband ad the little shelf under the washer and dryer, this weekend. And hopefully I can get the older kids at least a little more organized on laundry.

Pumpkin Snickerdoodles!

So I like to bake by just throwing things that sound good into the mixer. Yesterday I was thinking cookies, I had made these chocolate chip pumpkin cookies a couple weeks ago and they were a huge hit. This is definitely what I had in mind when I started. Then about half way through dumping things into my mixer I decided not to add any chocolate.  I had also made these amazing baked pumpkin donuts, and just thinking of the cake like texture and the cinnamon sugar coating made me drool a little.

So I decided to take my cookie dough and make tiny little bite size cookies and roll them in cinnamon sugar. They turned out super tasty.

Photo Credit
1 cup butter softened
3/4 cup sugar (beat together)
add 2 eggs (beat until pale)
add 15 oz can of pumpkin puree
add 1 tsp cinnamon
1/4 tsp cloves, ginger, allspice, and nutmeg
add 1 1/2 tsp baking powder
gently add in 2 1/2 cups of a/p flour

scoop with your smallest scoop and roll in cinnamon sugar (I used 1 cup sugar and 3 tbs of cinnamon) place onto parchment lined cookie sheet and bake at 350 degrees for about 8 minutes.


I didn't take this photo, my cookies were all eaten up by kids and husband before I got to the camera part of the day. But they turned out really yummy. You could also put all the pumpkin spices into the sugar you roll the cookies in.

These were super easy, the recipe made about 50 bite size cookies. If you make a larger cookie you will want to bake a little longer.

Wednesday, November 13, 2013

Christmas Tutu Dress Made!

So I decided it was way cheaper to make than buy these cute dresses.
                                                         
They turned out really pretty, and super poofy. But the girls love it that way.

For the two dresses I read a ton of tutorials and then decided to just go for it. I ended up buying five rolls of ivory at 25 yards per roll and 4 rolls of red glitter at 13 yards per roll and 3 rolls of green glitter at 13 yards per roll. I also bought a roll of stretchy elastic ribbon, and a pretty glitzy flower button. Every single item was 50% off at Hobby Lobby. I Spent about $30 including taxes. I had a needle and thread to start with.

I spent about three hours total making both dresses. I used a crochet hook to help me pull the tulle through the holes in my decorative elastic ribbon, regular elastic might have been easier. I will also be making a slip for my older daughter to wear under her dress (hopefully this will cost nothing with some leftover fabric) and I will put the baby in a white onesie (that she already has) to keep her warm and covered.

Next time I will NOT let my daughter choose the sparkly tulle, it was very sticky and hard to pull, it was also a lot less soft than the ivory. Don't even get me started on the mess from the glitter, it is still everywhere.

Overall it was a lot less money than purchasing, the kids love them, and it only took a few hours, I made them while watching a movie, definitely worth it. If you don't want to make one, check my etsy site in the near future and you can purchase one custom made for your child.

Bites for Thanksgiving

Thanksgiving is the holiday that I get to host. The grandparents on both sides still insist on having christmas festivities at their house. I get that but I really wish they would decide to all come over bringing their one (i can't get them to agree to this number either) gift per child on one day. Anyway I love hosting thanksgiving, it is so much nicer than toting the kids from one house to another. When we get all the families together it tends to be a pretty big event. I ask everyone to bring one side dish and end up only getting to cook a few basics, I always do the turkey and the pies and usually the potatoes and then I'm done.  I am not exactly complaining, it is really nice not being overly stressed by trying to make the huge spread. But I love to cook and I love to show off new or amazing recipes for anyone other than my kids (who refuse to try anything new).

So this year besides my tried and true basics.  I am going to make some small bites for the coffee table.  They need to be super beautiful, super delicious, and magically fit the dietary restrictions of my sister. She doesn't eat wheat, rice, or oat (it's kind of a pain) she never complains so I am always looking for a few recipes that never had these ingredients to start with. I would like to do about half sweet, and half savory.

Here are some amazing recipes I found, I will make all of them ahead of time, taste each one to make sure they are worth showing off and then store them in the freezer until the day of: Yummy, pretty and easy!

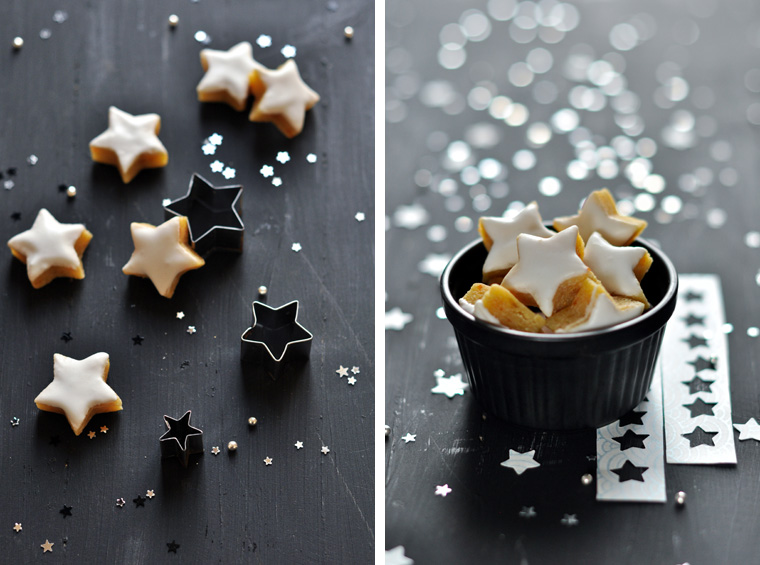
Sweet Stars


Aren't those the cutest? you can find the recipe here.

Cranberry Almond Cookies


  Not gluten free but a recipe many of my family members will love, find the recipe here.

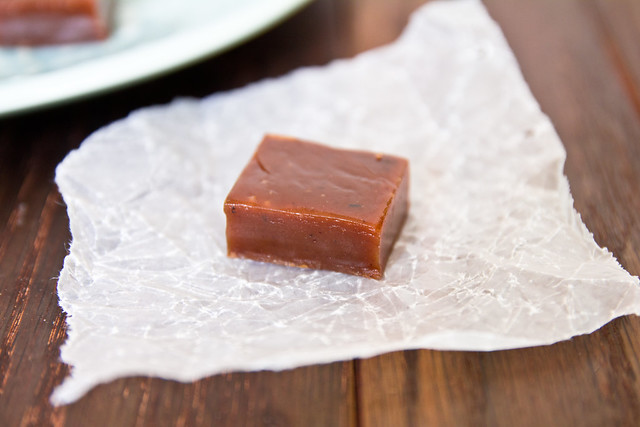
Gingerbread Caramels


I know right. Amazing recipe here.

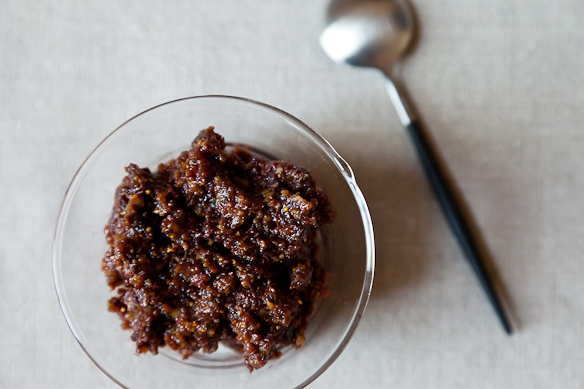
Fig and Olive Tapenade


Not as pretty as the others but the recipe looks super tasty, I will serve it with some crostinis and maybe some apple slices. Recipe here.

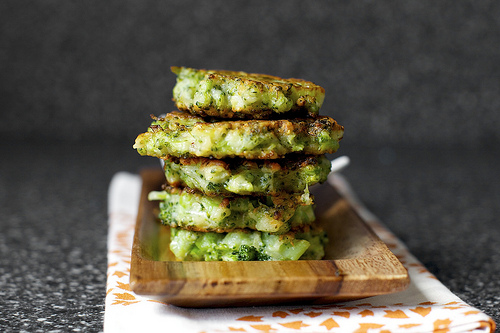
Broccoli Parmesan Fritters


I know amazing! I will definitely sub the a/p flour for some corn flour and of course fry them up just before serving. Find the recipe here.

Cucumber Cups and Salmon Salad


These should be light refreshing and super yummy. Recipe here.

I will let you know how they go over.


Friday, November 08, 2013

Holiday TuTu Dress - Do it Myself?

So my six year old daughter goes to a school where "certain" mothers dress their girls (who are usually about a year and a half apart) in the same outfit, with the same hairstyle and the same shoes. And for some reason she thinks this is the greatest cutest fun thing ever. She finally got a sister (three months ago) and loves the idea of dressing like twins. Anyway the baby is in 3-6 month size and my tall beautiful girl is a 7 slim. There is nothing in the world of retail (that I have found) where you can buy the same outfit in these sizes. Its just totally impossible. They do both have jeggings that are the same style but this is not enough for my daughter.

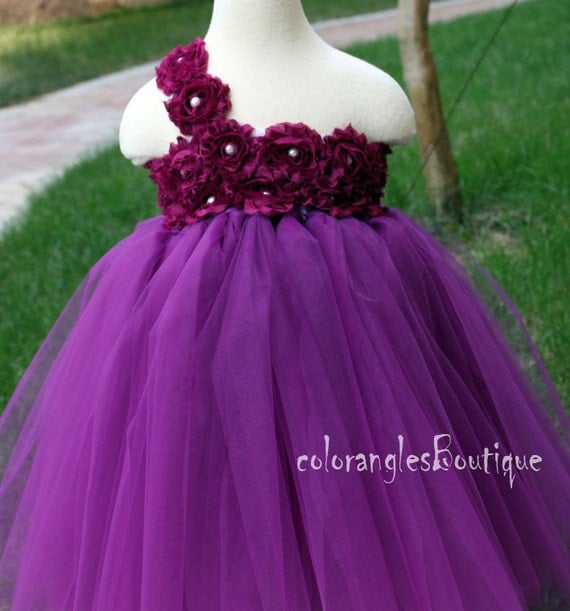
I happen to be blessed with family that can sew but of course there is hardly ever any time for sewing custom clothes to humor my daughter. Matching Holiday Dresses seems like an excellent idea.  Etsy has tons of made to order really cute little tutu dresses.  Here are a couple of my Favorites:
Photo Credit
Photo Credit

So I could order a lovely dress for each child and spend 100-200 hundred dollars. That is a little outside my Holiday Dress Budget this year. So I went toPinterest and added diy to my search and I found about a hundred blogs on how to make a cute Tutu dress, for about 10-20$ worth of supplies. This is definitely closer to my budget.

 I love this one,  she is starting with a dress and adding the tutu to it.
Photo Credit

But I don't have two dresses that match already for the girls so this is not an economical choice. 

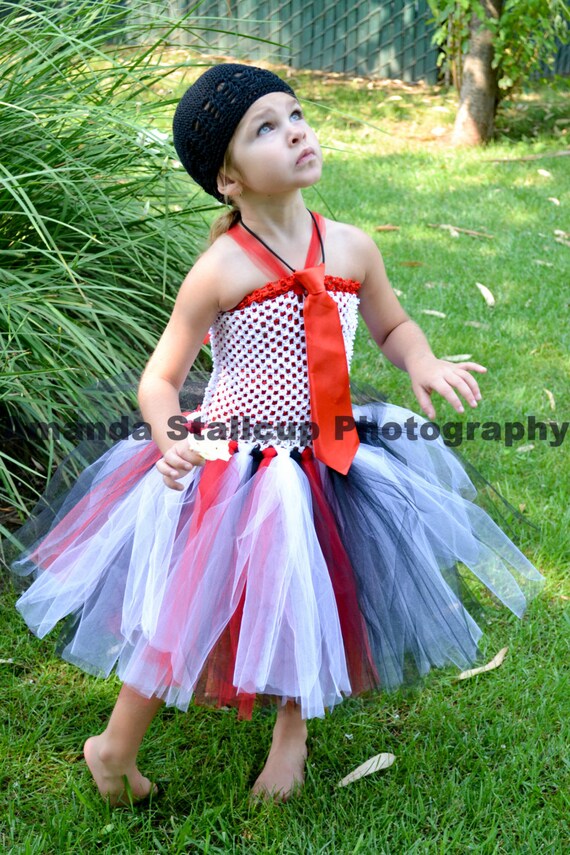
And then I found this one:

Photo Credit

Is it just the super adorable girl, or is this the cutest dress ever? Yeah I thought it might be the super adorable girl, I think this particular tutu will not be quite as cute on my four foot tall six year old. I love that she used the tulle for the straps.

So I will make that design for the baby, and this design for the Six year old.
Photo Credit
I think the only real difference in these dresses is that on the older girl, the dress is not so full. They will of course be in matching christmassy colors, I am thinking ruby and pale green.

Updates to come.


Chocolate Hazelnut Goodies!

 
I'm in a Nutella kind of mood today. Doesn't everyone just love this stuff, creamy, chocolaty and delicious! I try not to feed it to my kids on toast very often. Not that its not amazing and just as good a source of protein as peanut butter, but I don't want them to think of sweet chocolatey yumminess as an everyday kind of food. I want it to be a treat. So I had an amazing idea. TRUFFLES. I love truffles. They are an amazing dessert. Do you want a list why I love truffles? I thought so.

Truffles are:
1. Delicious
2. A lovely small pre portioned amount
3. Rich enough that you don't feel the need to eat twenty
4. Super special, bring anyone truffles and they feel happy and special
5. Really easy to execute. These things do not take baking skills, or decorating skills to do a great job on. (they do take high quality ingredients though)

So here is my super simple, delicious every time and totally creative truffle recipe:

1 cup dark chocolate semisweet chips
1 cup heavy cream

Buy the best quality you can, heat the cream over medium on the stove until it is good and hot, (simmering not boiling) take it off the heat. Stir in Chocolate. Stir some more till its melty and amazing. Add the secret ingredients:

1/2 tsp instant coffee granules
1 tsp vanilla extract

Put in a bowl and chill in refrigerator. once totally cold and hard, pull it out, use a spoon and your hands to make small balls. If you do this nice and quick and then roll in your choice of toppings.

If you want more perfect balls, freeze them, then take them out and roll around in your hands for a second to make more round before rolling in a topping.

Photo Credit: http://www.instructables.com/id/Easy-Truffles/


Toppings:

Classic: Cocoa powder (unsweetened) dump in a bowl (feeling courages add a tablespoon of red chile powder for truffles with a kick) roll truffles in powder, shake off excess and place on pretty plate. Roll. Shake. Plate.

Mocha: take your instant coffee granules and blend in the food processor until nice and fine. Roll. Shake. Plate.

Lavender: (these taste amazing) pick up some organic lavender in the salad section of your grocery, process with equal parts lavender and superfine sugar. Roll. Shake. Plate.

Hard Chocolate (These are a little more skilled to make): Freeze your balls, Melt some high quality chocolate in a bowl over simmering water, stir until just melted, remove from heat but leave on top of water, Dip your frozen truffles into the melted chocolate, place on a cooling rack where the excess can drain off or onto a parchment lined cookie sheet. (its easiest to dip truffles into plenty of chocolate so use more than you need)

Nuts: Use any kind of nut you like, Pistachio, walnut, pecan, almond, piñon, etc. Chop finely or food proceess to your liking, they are prettier if they are really fine, but i like the crunch you get with a slightly bigger nut. Roll. Shake. Plate.

Powdered Sugar: Roll. Shake. Plate.


Today I am making Nutella Truffles, and wouldn't you know it, pinterest has done this before. Nutella Sea Salt Truffles

Don't you just want to make/eat those? I did. and they were amazing. I am going to take some to my gluten free sister this afternoon. (another amazing thing about truffles, naturally gluten free) and make her feel special for no reason and with unbelievably little effort.


These also make an amazing Christmas present: Some packaging ideas from, you guessed it, Pinterest.
 

Sunday, November 03, 2013

No Bake Deliciousness

Do you ever have one of those cravings? The I have to have something sweet and there is nothing in the house kind of craving? I get those a lot, yesterday I ran out of milk, which meant I only got one cup of my amazing coffee. I normally drink two or three, yes I know how addicted I am.  I really wanted more but not badly enough to drag my five children to the grocery store. I will not go to the grocery store with the kids unless I have a long list, there is not one thing I ever need badly enough for that hassle.

So instead I channeled my coffee craving into a general sweets craving. I didn't want to spend time baking, and there was definitely not any pre made baked yumminess in the house. So naturally I went to Pinterest and decided to do a search for "no bake". I found a ton of cheesecake recipes that didn't really work with my list of ingredients in the house. I was looking for something with a little more ease and only pantry ingredients.

So i found these Oatgasm: No Bake Pumpkin Oatmeal Bites and these looked really good, but I didn't want to wait for them to chill before eating. So I will be making and raving about these in the future I am sure, But I decided on this peanut butter variation of my mom's Chocolate Haystacks.

This is my mom's chocolate haystack recipe, she always has a batch in the freezer (where my mom keeps all her baked goods) during the holiday season.


  • 1/2 cup butter
  • 1/2 cup milk
  • 2 cups sugar
  • 1/2 cup cocoa
  • Dash of salt
  • 1/2 tsp vanilla

     melted on the stovetop
stir in

  • 3 cups quick oats
  • 1 cup unsweetened coconut

   drop teaspoonfuls onto a parchment lined cookie sheet and chill until firm

Eat the yummy amazingness. My husbands mom has a similar recipe that she calls "moose poop."  Yeah I really don't get that.

Anyway I don't particularly like peanut butter, I eat it maybe once a year, and I tend to abhor the peanut butter ruining delicious chocolate foods. But for some reason unbeknown to me I decided to try this Peanut Butter Oat Ball Recipe I of course changed it to fit my needs. I left out the chia seeds (because I didn't have any) and I doubled the chocolate chips and omitted the honey, figuring it would hold together the same and be a little more chocolatey. I also started eating them before chilling. Anyway I ate one and it was pretty good considering it had peanut butter in it, but then I remembered that I don't really like peanut butter and so i scooped out the rest of them, chilled for fifteen minutes in the freezer and gave them to the kids after dinner.

They were a huge hit, the kids loved getting dessert (which is not a regular after dinner event in our house) and they don't have the peanut butter hang up I have.

Thursday, October 03, 2013

Organization Ideas to implement TODAY!

Thursday usually feels like a recovery day for me as Wednesdays are even more busy than our normal chaotic hectic life. My Wednesdays often start at 4:30 or 5:00 am (earlier if I am feeling whiney) and often end around midnight. It is one of those days with lots of obligations, school for the kids and a class in the evening for the husband, along with catechism for the oldest, and running obligations (admittedly I just changed that from Wednesday to Thursdays). That doesn't even count any cooking, cleaning or errands that get done as they come up.

So naturally yesterday I didn't do any cleaning, and today my house looks like a tornado tore through it. It makes me pretty unhappy that my children make such a big mess in such a short time. The house was tolerably clean on Tuesday.  This morning I loaded the dishwasher and switched the laundry. I also put away the peanut butter, cooking spray, bread, etc that got left on the counter Wednesday. This made the kitchen livable. Although I still need to do the floors. I HATE SWEEPING, MOPPING, and VACUUMING! I try to give these jobs to my husband or kids as often as possible. But they really make a huge difference in how clean the house feels so if anyone has tips to make these chores less of a chore I would LOVE them.

I still need to pick up about a million things in the living room, scrub the dining table, vacuum, fold and put away clothes and pick up about 50 pieces of masking tape that my one year old tore off of my front door.  This doesn't include the disasters in their bedrooms.

I want to have the kids clean as much as possible so I have been searching pinterest for ways to help them clean up and ideas they can do to help keep the house cleaner everyday.

Here are some ideas I found:

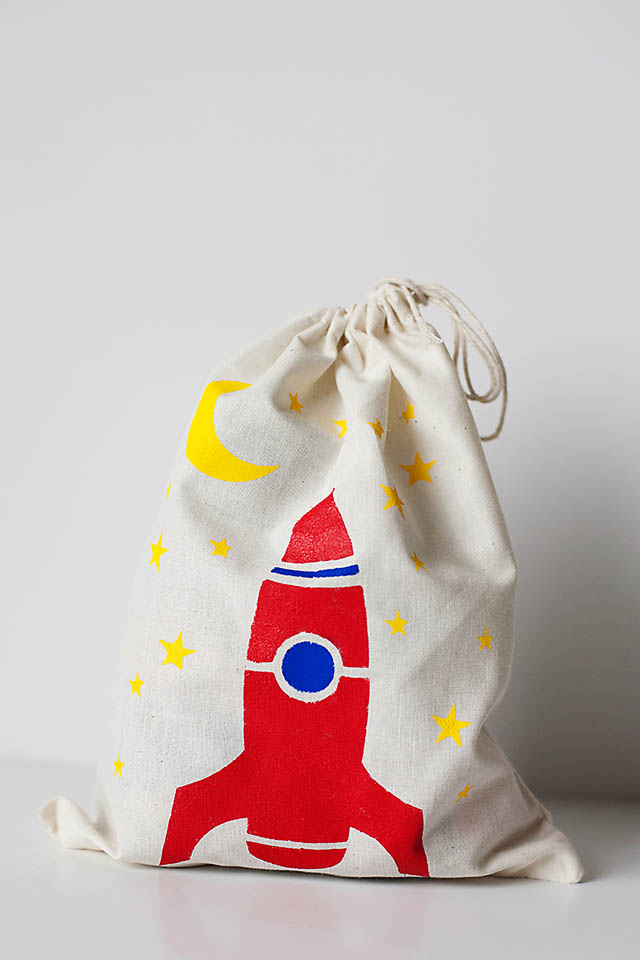
Painted Toy Bags
I have a bunch of soft Toy Boxes for the kids, today we will use this inspiration to paint each one with pictures of the toys that belong inside, I can see one with a car, one with balls, one with a doll, one with animals. I hope this helps the boys actually put things away, but if not at least it will be really cute.


Cardboard drawer Organizer
We all have one of those crazy messy junk drawers that we dump everything that doesn't have a place into. At our house we call it "dad's tool drawer" and it is primarily everyday tools that aren't kept in the shed, like the hammer, screwdrivers, duct tape. Lately it has been spilling into the drawer next to it, that is not cool. I have tons of cardboard in my recycling, I think i can find some pieces to fit the junk in the drawer and make it stay in one drawer that closes without any trouble.


.


I know what you're thinking only two new ideas. But I still have to do laundry and vacuum, and I feel that goals should be realistic.


Wednesday, October 02, 2013

Last minute kids gifts ahead of time

 You can find You know how on the night before the last day of school before winter vacation your daughter comes and tells you she has 15 best friends who she just has to give holiday presents too?

This year why not get the jump on her, when you still have time set aside an afternoon to make a bunch of easy and inexpensive but thoughtful gifts. Friendship Bracelets are great. You remember that box of colorful string and instructions she got for her birthday two years ago from your friend who doesn't have kids? You know the one she subsequently tied up her little brothers with and you had to cut the mass of tangled embroidery floss from him, while they were all screaming and crying; then you threw out every string you could find and cursed your well meaning friend? That's the stuff, but some more string, but maybe only three or four colors. After all besties all need matching bracelets anyway.

The only two problems with this are: she wants to make them all for herself and she wants to give them out immediately.

So after indulging, I mean practicing, on the first ten for her; and figuring our where to put them away where you will find them and the kids won't; it's time to get down to business. After extensive research on Pinterest I found
a ton of cute modern touches to your basic knotted up string. 

And the winners are: Lego center detail 


Bangle friendship bracelets You can find my pinspiration here :http://www.diy-craft.com/2013/07/how-to-make-summer-bracelet.html obviously my version is much simpler.

And of course just a classic friendship bracelet 
 These could be personalized by adding a charm with the initial of their first name or an animal or something unusual from around the house like small buttons or sequins tied into them.

My tips: it doesn't matter what kind of knot you use as long as you tie it in the same direction every time.  Pin the end of your work to the back of a chair or something to make it faster. If you don't want to make your own keep an eye on my etsy site for a bunch of choices soon!

Tuesday, October 01, 2013

" I found it on Pinterest"

So every morning I get up before the crack of dawn (around 5am) with my husband so we can have coffee before he leaves for work at 5:30. This is often the best part of my day, I am not a morning person, I hate getting out of bed, but its quiet and he makes me coffee and we get a few minutes alone together.

So the coffee thing has definitely become a ritual, he puts the Moka Pot on the stove and when its ready adds about an ounce of chocolate syrup and then fills my cup with milk and brings it to me.  This is essentially a homemade Mocha Latte. If you don't have a Moka Pot and love espresso I strongly suggest you get one, it is the easiest, cheapest way to make espresso at home.  We then watch the news and talk about the upcoming day or week for a few minutes. I have noticed that on the days I am too tired to get up (like when I was up all night with the baby) I am significantly grumpier.

Anyway today we ran out of chocolate syrup! He made coffee with sugar in it, and it was fine but all day I was wishing I had the chocolate. We are right in the middle of paydays and I could just run to Costco for a new jar of chocolate but this would inevitably wreak havoc on my budget. And I am trying so hard to stick to a budget.

So I decided to try out one of the bazillion recipes for chocolate syrup that I found on pinterest.
This is the recipe I picked Decadent Chocolate Syrup and I totally picked it because she called it decadent. I think all the recipes are pretty much the same; it's simple syrup with a boatload of cocoa powder in it. I added a good teaspoon of instant coffee just for good measure and threw the pot on the stove.


Doesn't that look delicious? I thought so too, and when i licked the spoon (and burned my tongue) it was totally worth it.  This recipe was totally easy, but I would recommend making it during nap time because when I stepped away for two minutes to change a diaper it totally boiled over. It didn't burn though and it wiped off the stove pretty easily so no harm done. 

I am so looking forward to having my normal coffee tomorrow morning, and I am sure it will be totally delicious. 

Mummy Door

My husband is pretty sure I have lost my mind with this one. I bought two rolls of masking tape at the dollar store and made my front door into a mummy.

I really like the way the tape is kind of loose like real bandaging would be, but i hope it lasts till halloween.

Haunting my Kitchen

Lately there have been the cutest paper skulls eating my fruit, stealing the butter, and drinking my coffee. Continuing with my neon theme this year I loaded my printer with neon green before printing...and I think they came out amazing. I love to continue the Halloween decor inside the house, even if it is only in small details.
This adorable paper skull is number 72 from skulladay.com . He took me about twenty minutes to cut out and assemble. I love the moving jaw, I love that the whole thing is made from one sheet of paper. I just happened to have some neon green paper on hand. These could also be painted and would probably last a lot longer if made with card stock but I didn't have any on hand.  This skull was a little too difficult for my six year old to create by herself, she was able to make it with a little help. It was way too hard for my younger boys.


These beautiful sugar skulls came from Lorna Love they are super easy to make, it took me about ten minutes, my daughter was able to cut, fold, and glue these with no assistance, and the younger boys each made one with a little help. They are super fun super cute and i bet they would be amazing filled with little candy as a special halloween gift for family or maybe the kids teachers. I especially loved the glittered version from her website, I may need to cover one of mine in glitter. 

Monday, September 30, 2013

Chewy Moist Healthy French Bread.

Today has been a slow day, school, housework, and a little cooking.

I try to make bread more often than buying it because its cheaper and more delicious. I also love to know exactly what is in the things my children are eating. I have tried this amazing Amish White  Bread recipe a ton of times and my family usually eats a whole loaf in one evening. There is nothing especially healthy about this bread but it is home made.

Today I was trying to make a bread with a little more substance and a little healthier. So I found a basic french bread recipe and substituted one third of the flour with whole wheat and used avocado oil instead of cheap vegetable oil.


Here is the recipe:

2 cups warm water

1 tablespoon yeast1 tablespoon avocado oil1 tablespoon agave syrup2 teaspoons salt3 -5 1/2 cups bread flour
2 cups whole wheat flour

Directions:
Dissolve yeast in warm water (110 degrees) and agave in large bowl; allow yeast to proof or foam (about 10 minutes).Add salt, oil, and 3 cups flour; beat for 2 minutes.Stir in 2 cups flour to make a stiff dough. (I always start with the whole wheat)Knead until smooth and elastic, about 10 minutes.5 Place in oiled bowl, turn dough to coat all sides, cover and let rise until doubled.Punch down and divide in half.Shape dough into two long slender loaves.Grease and sprinkle with cornmeal either a french bread pan or large cookie sheet.Place loaves in pan and cut diagonal gashes on top of each loaf (I use scissors).10 Cover and let rise until doubled.11 Bake at 375 degrees for about 30 minutes.12 Note: You can sprinkle or spray water on the loaves during baking if you want a really crunchy crust.

adapted from food.com

here is what it turned out like, 


We waited as long as we could, and then slathered a little almond butter onto the warm slices and called it lunch. The crust turned out crunchy and chewy, and the inside was tender and soft, in fact thinking about it makes me want another slice. 


Thursday, September 26, 2013

Lotion Bars for Stocking Stuffers


I know what you are thinking, "Stocking stuffers?!? It's still September!" and I can see your point. But my holiday shopping list is really long. I have a lot of big families in my family. So I think about gift giving all the time, and am always for finding great deals and storing them away until needed.

Sometimes this backfires on me, my kids find a bag of toys in the top of my closet and make a tuesday morning christmas just for them.  But most of the time it really helps me stick to a tight budget, or save some money to spend on a place that would normally get overlooked, like myself or my husband.


So I found an easy lovely lotion bar recipe from this cute blog and thought immediately my mom and sisters would love that. They are all sensitive to perfumes and fake stuff so they usually spend a fortune on all natural skin care products.

Naturally I changed the recipe to suit what I had in the kitchen, but it works out basically the same.

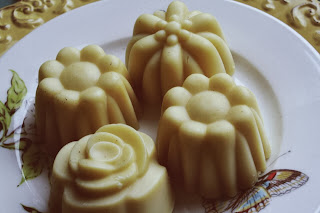
I used 1 part beeswax and 2 parts coconut oil. I did not bother with any scents as the beeswax and coconut oil smelled amazing. Melt together on low heat until totally liquid, then pour in a mold. I happen to have an amazing flower shaped silicone cupcake pan. (Thanks to my mother in law and whoever invited her to a pampered chef party)


Don't they look delicious? Anyway I have used these all summer, and they are amazing. I gave them to my family to beta test and they all beg for more. My little sister uses these instead of shaving cream and is shaving less often with no need to moisturize after. They are amazing, and I will just keep making more.


Don't have the time to make your own. These will definitely be on my Etsy site along with my husbands homemade olive oil soap sometime in the next few weeks.

Wednesday, September 25, 2013

5 Minute Chocolate Overload Cookies

It's been one of those weeks, you know one where its Wednesday and you are already complaining about what a long week you have had. I feel like I have done thirty loads of laundry in the last two days, realistically its been like ten. It is still a huge amount, ah the fun of seven people in one house. Anyway while another load is in the wash (and only like three to go!) I decided to whip up some amazingly delish cookies.

I call them 5 Minute Cookies, because thats about how long they take to mix up and how long they take to disappear.

Preheat Oven to 350 degrees
makes about 2 and 1/2 dozen

2 sticks unsalted butter
1/2 cup granulated sugar
1/2 cup brown sugar
2 eggs
1 tsp vanilla
1/3 cup cocoa powder
1 1/2 tsp baking powder
1/4 tsp salt
2 cups all purpose flour
3/4 cup slivered almonds
1 package (or about 1 1/2 cups) chocolate chips

Throw the butter and sugars into the mixer, and beat on medium till light and fluffy (do not add any more sugar or the cookies will be too sweet to eat) add the eggs, add the vanilla, cocoa, baking powder, and salt. I never sift my dry ingredients together so adding the baking powder and salt before the flour ensures that no one gets a salty bite. Turn the mixer down to low and add the flour, almonds and chocolate chips. Stop the mixer immediately after the chocolate chips are added and mix them gently by hand if needed. Scoop onto parchment lined cookie sheets and bake for about 15 minutes for a soft cookie and 17-19 for a crispier cookie.

Let cool for as long as you can wait (at least till the chocolate doesn't burn your tongue) and enjoy.


I am just hoping they last till my husband gets home from work. 

Bats and Neon and Vampire Pumpkins OH MY!

This weekend is the last one in September, which means at my house it's time to decorate for halloween! Yay I love this time of year, the weather is getting cold, the menus are getting full of baked goods and its time to start planning all the winter holidays.

The theme for halloween this year is Glowing! My kids are a little too young for anything spooky so the front porch light is getting a black light lightbulb and the decorations will be neon. I am also buying up tons of fun glow in the dark items from places like Target and Dollar Tree.

I found a few amazing ideas on Pinterest and here are two that made the cut, with a few minor changes to make it work for my family.

Neon and Bats

This pin was created using a bat cut out and sponging neon colors over it. I love the look. On sunday my family will be using white butcher paper (which we usually have in the house) and we will let the kids basically paint long sheets with as much neon paint as they want. Then the older kids (and those of us who still behave like kids as often as possible) will cut and paste black construction paper (which we also have on hand) bats to the background. The plan is to hang these all around the front porch to make a pretty large decoration for almost no cost. I will post pictures of our version next week.

Vampire Pumpkins


Aren't these the cutest things? I feel like I saw somewhere that this original idea came from Martha Stewart, but i am not positive, I couldn't find a link to it on her website. 

My boys helped me make a few pumpkins like this:


These are the carve able pumpkins from the dollar store. I loved the price and the fact that they won't decay but they definitely looked like the cost a dollar, so i will probably invest in some white pumpkins that are real a little closer to halloween. Anyway we sprayed them white and added glow in the dark fangs and glow in the dark mustaches that both came from Target. The eyes I had in my craft kit but I believe they are available in a huge pack at the dollar store. All told I make 6 pumpkins like this for $9. That includes a new can of white spray paint. This was easy enough for my kids to help with, but it wasn't very labor intensive so they we're happier playing with the finished project than making them.

We will also add a few big pumpkins to the front porch and maybe one of those wreaths from pinterest and the house should look fairly festive!

Saturday, September 21, 2013

Pinterest Dinner Board

In an attempt to eat healthier and be more organized, I have decided that I must make a meal plan.  This is not the easiest thing in the world for me, but I am going to do it.

I already have a ton of food on my Pinterest boards, so I created a new one.

Dinner this week 

And (fingers crossed) every saturday I am going to update the board with all new ideas for dinner, create a shopping list, and then follow through by making those items for dinner all week.

 Doesn't this soup from Rachael Ray look delish? My family will be eating this for dinner on Thursday, I will let you know how it works for me and if my picky kids will even try to eat it. 

So here is my shopping list for the week:

Shopping List – Dinner this week – 9/22-9/28
Already Have  

From Pantry
2 cans corn
2 cans black beans
1 can tomato sauce
1 can tomato paste
8oz Penne
½ cup chicken stock
2 cups marinara sauce
1 cup dried lentils
4 cups beef stock
¾ cup stone ground polenta
¼ cup brandy
½ cup panko bread crumbs

From the fridge
onion
2 stalks celery
garlic
1 beer
butter
fresh peas
fresh basil
feta
6 eggs
5oz fresh shredded cheese (Mexican blend)
carrots
milk

Spices
cumin, coriander, oregano, cilantro, chili powder
salt and pepper, thyme, dried basil, dried parsley, 2 bay leaves, fresh rosemary, dried chives

Need to Buy   

Meat
1lb ground beef
1lb pork sausage

Canned Goods/Condiments
2 cans chili beans
Red wine vinegar

Dairy
1 cup grated parmesan
½ cup ricotta
grated pecorino Romano cheese
1/3 cup soft goat cheese

Produce
Spinach
Apple
5 bell peppers
1 pound asparagus
2 cups cherry tomatoes, 2 large tomatoes
1 pound butternut squash
2 cups cooked spaghetti squash

I potato

* Here's hoping this becomes a habit*