Showing posts with label DIY. Show all posts

Thursday, November 14, 2013

Laundry Nightmares

Today I am doing laundry, I do laundry everyday but I don't count it as done until it is folded and put away.

Do you also end up with three or four or ten baskets of clean laundry stacked up waiting to be folded and put away? Mine end up on the second couch, you know because if they were on the floor I would think they were dirty. Anyway the laundry got switched a few times this weekend, maybe four, but never got folded or put away. I don't mind folding, but I hate putting away the kids laundry. When I don't put it away they throw every item into one drawer so it is over stuffed and they still can't find anything, and half of it ends up on the floor and needing washed again before it was ever worn.  I guess they are still too young to put away their laundry.

I will occasionally fold everything and divide it into baskets for each child and hope that my husband will take the hint and put everything away. He often does not have the time after getting off of work late to help with laundry (and I think he hates it as much as I do). So the kids dig their clothes out of the baskets for a few days until I can't stand the mess and I fold everything again and put it all away.

We have a horrible laundry room, in that we don't have a laundry room at all. We rent and we found a house with laundry when we moved, but what it should say is washer and dryer hookups at the end of the kitchen between the oven and the pantry. It is a huge step up from the laundry mat but there is no storage for laundry and no room for folding of any sort. I was looking on Pinterest for ideas that I might actually be able to implement to make this never ending job a little easier or less chaotic.

I dream of this


This is about the space I have


Then I found this blog, the inquisitive mom. She has a great post on how to get each kids laundry organized, I will implement her two baskets per child idea for my two older kids and add it as the little ones can get into putting their clothes into their own basket. At this point I am lucky if they put their clothes into any hamper. They are often left on the bathroom floor or my bedroom floor.  So I am definitely going to have my husband ad the little shelf under the washer and dryer, this weekend. And hopefully I can get the older kids at least a little more organized on laundry.

Wednesday, November 13, 2013

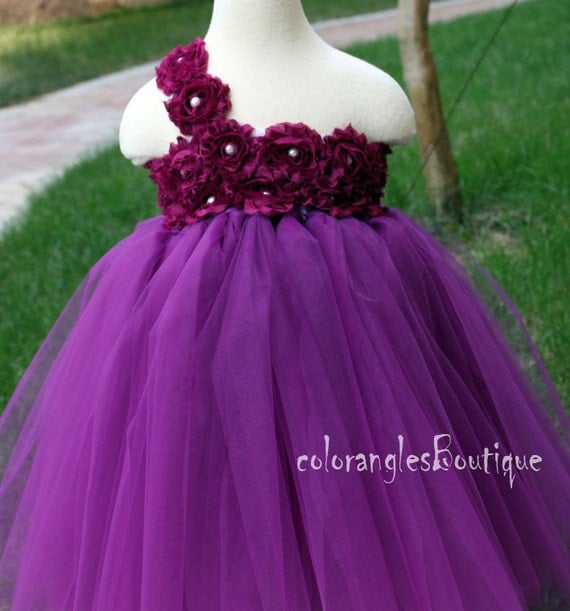
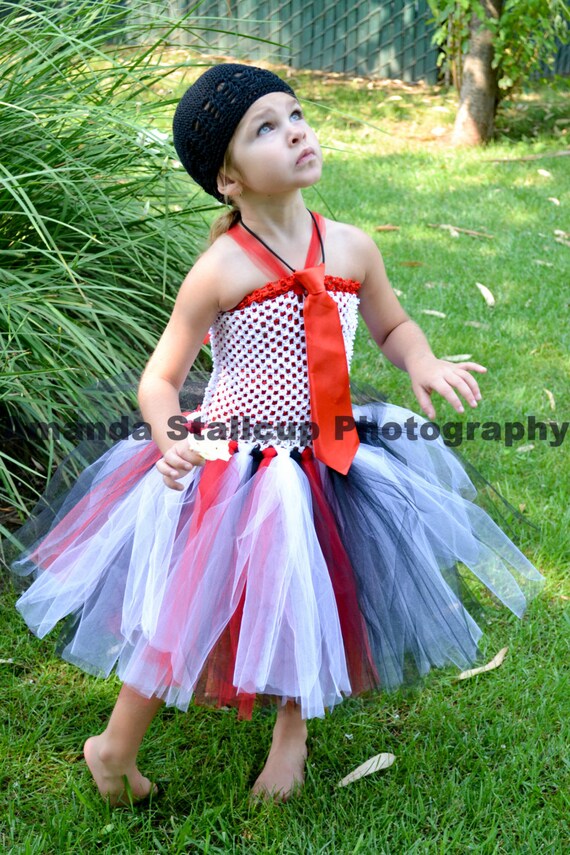
Christmas Tutu Dress Made!

So I decided it was way cheaper to make than buy these cute dresses.
                                                         
They turned out really pretty, and super poofy. But the girls love it that way.

For the two dresses I read a ton of tutorials and then decided to just go for it. I ended up buying five rolls of ivory at 25 yards per roll and 4 rolls of red glitter at 13 yards per roll and 3 rolls of green glitter at 13 yards per roll. I also bought a roll of stretchy elastic ribbon, and a pretty glitzy flower button. Every single item was 50% off at Hobby Lobby. I Spent about $30 including taxes. I had a needle and thread to start with.

I spent about three hours total making both dresses. I used a crochet hook to help me pull the tulle through the holes in my decorative elastic ribbon, regular elastic might have been easier. I will also be making a slip for my older daughter to wear under her dress (hopefully this will cost nothing with some leftover fabric) and I will put the baby in a white onesie (that she already has) to keep her warm and covered.

Next time I will NOT let my daughter choose the sparkly tulle, it was very sticky and hard to pull, it was also a lot less soft than the ivory. Don't even get me started on the mess from the glitter, it is still everywhere.

Overall it was a lot less money than purchasing, the kids love them, and it only took a few hours, I made them while watching a movie, definitely worth it. If you don't want to make one, check my etsy site in the near future and you can purchase one custom made for your child.

Friday, November 08, 2013

Holiday TuTu Dress - Do it Myself?

So my six year old daughter goes to a school where "certain" mothers dress their girls (who are usually about a year and a half apart) in the same outfit, with the same hairstyle and the same shoes. And for some reason she thinks this is the greatest cutest fun thing ever. She finally got a sister (three months ago) and loves the idea of dressing like twins. Anyway the baby is in 3-6 month size and my tall beautiful girl is a 7 slim. There is nothing in the world of retail (that I have found) where you can buy the same outfit in these sizes. Its just totally impossible. They do both have jeggings that are the same style but this is not enough for my daughter.

I happen to be blessed with family that can sew but of course there is hardly ever any time for sewing custom clothes to humor my daughter. Matching Holiday Dresses seems like an excellent idea.  Etsy has tons of made to order really cute little tutu dresses.  Here are a couple of my Favorites:
Photo Credit
Photo Credit

So I could order a lovely dress for each child and spend 100-200 hundred dollars. That is a little outside my Holiday Dress Budget this year. So I went toPinterest and added diy to my search and I found about a hundred blogs on how to make a cute Tutu dress, for about 10-20$ worth of supplies. This is definitely closer to my budget.

 I love this one,  she is starting with a dress and adding the tutu to it.
Photo Credit

But I don't have two dresses that match already for the girls so this is not an economical choice. 

And then I found this one:

Photo Credit

Is it just the super adorable girl, or is this the cutest dress ever? Yeah I thought it might be the super adorable girl, I think this particular tutu will not be quite as cute on my four foot tall six year old. I love that she used the tulle for the straps.

So I will make that design for the baby, and this design for the Six year old.
Photo Credit
I think the only real difference in these dresses is that on the older girl, the dress is not so full. They will of course be in matching christmassy colors, I am thinking ruby and pale green.

Updates to come.


Chocolate Hazelnut Goodies!

 
I'm in a Nutella kind of mood today. Doesn't everyone just love this stuff, creamy, chocolaty and delicious! I try not to feed it to my kids on toast very often. Not that its not amazing and just as good a source of protein as peanut butter, but I don't want them to think of sweet chocolatey yumminess as an everyday kind of food. I want it to be a treat. So I had an amazing idea. TRUFFLES. I love truffles. They are an amazing dessert. Do you want a list why I love truffles? I thought so.

Truffles are:
1. Delicious
2. A lovely small pre portioned amount
3. Rich enough that you don't feel the need to eat twenty
4. Super special, bring anyone truffles and they feel happy and special
5. Really easy to execute. These things do not take baking skills, or decorating skills to do a great job on. (they do take high quality ingredients though)

So here is my super simple, delicious every time and totally creative truffle recipe:

1 cup dark chocolate semisweet chips
1 cup heavy cream

Buy the best quality you can, heat the cream over medium on the stove until it is good and hot, (simmering not boiling) take it off the heat. Stir in Chocolate. Stir some more till its melty and amazing. Add the secret ingredients:

1/2 tsp instant coffee granules
1 tsp vanilla extract

Put in a bowl and chill in refrigerator. once totally cold and hard, pull it out, use a spoon and your hands to make small balls. If you do this nice and quick and then roll in your choice of toppings.

If you want more perfect balls, freeze them, then take them out and roll around in your hands for a second to make more round before rolling in a topping.

Photo Credit: http://www.instructables.com/id/Easy-Truffles/


Toppings:

Classic: Cocoa powder (unsweetened) dump in a bowl (feeling courages add a tablespoon of red chile powder for truffles with a kick) roll truffles in powder, shake off excess and place on pretty plate. Roll. Shake. Plate.

Mocha: take your instant coffee granules and blend in the food processor until nice and fine. Roll. Shake. Plate.

Lavender: (these taste amazing) pick up some organic lavender in the salad section of your grocery, process with equal parts lavender and superfine sugar. Roll. Shake. Plate.

Hard Chocolate (These are a little more skilled to make): Freeze your balls, Melt some high quality chocolate in a bowl over simmering water, stir until just melted, remove from heat but leave on top of water, Dip your frozen truffles into the melted chocolate, place on a cooling rack where the excess can drain off or onto a parchment lined cookie sheet. (its easiest to dip truffles into plenty of chocolate so use more than you need)

Nuts: Use any kind of nut you like, Pistachio, walnut, pecan, almond, piƱon, etc. Chop finely or food proceess to your liking, they are prettier if they are really fine, but i like the crunch you get with a slightly bigger nut. Roll. Shake. Plate.

Powdered Sugar: Roll. Shake. Plate.


Today I am making Nutella Truffles, and wouldn't you know it, pinterest has done this before. Nutella Sea Salt Truffles. 

Don't you just want to make/eat those? I did. and they were amazing. I am going to take some to my gluten free sister this afternoon. (another amazing thing about truffles, naturally gluten free) and make her feel special for no reason and with unbelievably little effort.


These also make an amazing Christmas present: Some packaging ideas from, you guessed it, Pinterest.
 

Wednesday, October 02, 2013

Last minute kids gifts ahead of time

 You can find You know how on the night before the last day of school before winter vacation your daughter comes and tells you she has 15 best friends who she just has to give holiday presents too?

This year why not get the jump on her, when you still have time set aside an afternoon to make a bunch of easy and inexpensive but thoughtful gifts. Friendship Bracelets are great. You remember that box of colorful string and instructions she got for her birthday two years ago from your friend who doesn't have kids? You know the one she subsequently tied up her little brothers with and you had to cut the mass of tangled embroidery floss from him, while they were all screaming and crying; then you threw out every string you could find and cursed your well meaning friend? That's the stuff, but some more string, but maybe only three or four colors. After all besties all need matching bracelets anyway.

The only two problems with this are: she wants to make them all for herself and she wants to give them out immediately.

So after indulging, I mean practicing, on the first ten for her; and figuring our where to put them away where you will find them and the kids won't; it's time to get down to business. After extensive research on Pinterest I found
a ton of cute modern touches to your basic knotted up string. 

And the winners are: Lego center detail 


Bangle friendship bracelets You can find my pinspiration here :http://www.diy-craft.com/2013/07/how-to-make-summer-bracelet.html obviously my version is much simpler.

And of course just a classic friendship bracelet 
 These could be personalized by adding a charm with the initial of their first name or an animal or something unusual from around the house like small buttons or sequins tied into them.

My tips: it doesn't matter what kind of knot you use as long as you tie it in the same direction every time.  Pin the end of your work to the back of a chair or something to make it faster. If you don't want to make your own keep an eye on my etsy site for a bunch of choices soon!

Tuesday, October 01, 2013

Mummy Door

My husband is pretty sure I have lost my mind with this one. I bought two rolls of masking tape at the dollar store and made my front door into a mummy.

I really like the way the tape is kind of loose like real bandaging would be, but i hope it lasts till halloween.

Haunting my Kitchen

Lately there have been the cutest paper skulls eating my fruit, stealing the butter, and drinking my coffee. Continuing with my neon theme this year I loaded my printer with neon green before printing...and I think they came out amazing. I love to continue the Halloween decor inside the house, even if it is only in small details.
This adorable paper skull is number 72 from skulladay.com . He took me about twenty minutes to cut out and assemble. I love the moving jaw, I love that the whole thing is made from one sheet of paper. I just happened to have some neon green paper on hand. These could also be painted and would probably last a lot longer if made with card stock but I didn't have any on hand.  This skull was a little too difficult for my six year old to create by herself, she was able to make it with a little help. It was way too hard for my younger boys.


These beautiful sugar skulls came from Lorna Love they are super easy to make, it took me about ten minutes, my daughter was able to cut, fold, and glue these with no assistance, and the younger boys each made one with a little help. They are super fun super cute and i bet they would be amazing filled with little candy as a special halloween gift for family or maybe the kids teachers. I especially loved the glittered version from her website, I may need to cover one of mine in glitter. 

Wednesday, September 25, 2013

Bats and Neon and Vampire Pumpkins OH MY!

This weekend is the last one in September, which means at my house it's time to decorate for halloween! Yay I love this time of year, the weather is getting cold, the menus are getting full of baked goods and its time to start planning all the winter holidays.

The theme for halloween this year is Glowing! My kids are a little too young for anything spooky so the front porch light is getting a black light lightbulb and the decorations will be neon. I am also buying up tons of fun glow in the dark items from places like Target and Dollar Tree.

I found a few amazing ideas on Pinterest and here are two that made the cut, with a few minor changes to make it work for my family.

Neon and Bats

This pin was created using a bat cut out and sponging neon colors over it. I love the look. On sunday my family will be using white butcher paper (which we usually have in the house) and we will let the kids basically paint long sheets with as much neon paint as they want. Then the older kids (and those of us who still behave like kids as often as possible) will cut and paste black construction paper (which we also have on hand) bats to the background. The plan is to hang these all around the front porch to make a pretty large decoration for almost no cost. I will post pictures of our version next week.

Vampire Pumpkins


Aren't these the cutest things? I feel like I saw somewhere that this original idea came from Martha Stewart, but i am not positive, I couldn't find a link to it on her website. 

My boys helped me make a few pumpkins like this:


These are the carve able pumpkins from the dollar store. I loved the price and the fact that they won't decay but they definitely looked like the cost a dollar, so i will probably invest in some white pumpkins that are real a little closer to halloween. Anyway we sprayed them white and added glow in the dark fangs and glow in the dark mustaches that both came from Target. The eyes I had in my craft kit but I believe they are available in a huge pack at the dollar store. All told I make 6 pumpkins like this for $9. That includes a new can of white spray paint. This was easy enough for my kids to help with, but it wasn't very labor intensive so they we're happier playing with the finished project than making them.

We will also add a few big pumpkins to the front porch and maybe one of those wreaths from pinterest and the house should look fairly festive!

Wednesday, November 17, 2010

Hot Cocoa Mix- Chai Spice


Turns out that on a weeknight, between work and dinner there is really only time for a short project. Sophia and I made the Chai Spice Cocoa mix and it was fantastic. Since you already have directions and a recipe on my previous mix I will just add pics. If you would like to try it but don't want to make it order a 16oz jar from my Etsy store.

These pictures show, the chopped bittersweet chocolate, the sugar cocoa powder and chai powder mix, and pouring the total mix into the jar. We need to make up a more festive label though. That will be tonight project. I think this is going to make a delicious gift for the people on the list, can't wait to try the almond cocoa mix and the spicy mexican cocoa mix. I have a feeling these are going to be yummy.

Tuesday, November 16, 2010

Paper Candle Shades

So my second idea for small presents is to create a paper candle shade. I saw some really beautiful candlesticks on Etsy and cannot afford anything like that, but I thought it would be really cool to try and come up with a simpler but just as beautiful idea. So I am off to the paper store to find some lovely inspiration and searching the ends of the internet for stencil designs that i might be able to use to make a similar design. I am thinking that I need to use a frame so that there is little or no risk on the burning down the house thing. So this weekend I am going to try and make a beautiful paper shade with some dimensional cut outs. I will post lots of pics and directions if it turns out okay and if not well, I will post the pictures and maybe try again or maybe move on to a new and more practical idea.

Monday, November 15, 2010

Jars of Hot Cocoa Mix


Today I am thinking of making jars of hot cocoa mix with my daughter for her to give as gifts to her teacher, and the secretary at my work, and maybe other people who deserve to be remembered with something thoughtful. Our budget is Super tight this year so over the next few weeks I am going to come up with, and execute ideas that make lovely presents for everyone on my list for as little money as possible. Since presents that require less money, tend to take more time to make Sophia and Desi and I are going to be working on small projects after school and before dinner and on bigger projects on Saturday afternoons.


First up is my idea for acquaintances who need more than just a card. I love to bake, and my children love to get messy in the kitchen so I am keeping this part kitchen themed. I can picture beautiful little jars of hot cocoa mix with directions and pretty handmade labels and lots of festive ribbon. Tonight we are going to try out three recipes: Almond Dark Chocolate Cocoa, Chai Tea Milk Chocolate Cocoa, and Spicy Mexican Cocoa. I figure that having some different flavors will take some of the kitschy out of this gift and make it memorable. When searching for hot cocoa recipes on the internet i found a bunch of dried milk and cocoa powder and sugar or powdered sugar recipes. To me that sounds like the same stuff you get in a box at the store. So I am going to make hot cocoa mix with chocolate to be added to hot milk.
Here is my basic recipe:

1/4 pound of Bittersweet baking Chocolate (grated)
1/4 cup mini chocolate chips (milk or dark your choice)
1/4 cup cocoa powder
1/4 cup white sugar

for the Chai tea recipe I am going to add 1/8 cup of Chai Tea powder (I found this at my local east Indian market) and mix that with the sugar
for the almond I am going to add 1/2 cup of Dried Almond Milk (I found this at the health food store)
for the Spicy Mexican Recipe I am going to add 2 Tablespoons of Cinnamon and 1 teaspoon of Cayenne Pepper

I wanted to layer these so they would look pretty in a jar, but I am thinking a nice mix will do better for preparing the hot cocoa. The directions will simply be to stir 1-2 tablespoons of cocoa mix into a glass of steaming hot milk. To heat milk can be done on the stove top on low heat so it doesn't scald or in the microwave for 1-2 minutes.

My daughter and I are going to make some of these up tonight and tomorrow I will post pics and reactions. If anyone wants to try out some of my recipes or suggest other delicious ideas I would love your comments.